
Virtual machines (VMs) are a great way to run multiple operating systems on a single computer, test software in isolated environments, or experiment with different OS configurations. In this guide, we’ll walk you through the step-by-step process of installing a virtual machine on your personal computer.
Step 1: Choose a Virtualization Software
The first step is to choose a virtualization software that allows you to create and manage virtual machines. Some popular choices include:
- Oracle VirtualBox (Free and Open-Source)
- VMware Workstation Player (Free for personal use)
- Microsoft Hyper-V (Built into Windows Pro and Enterprise editions)
For this guide, we will use VirtualBox, as it is free and easy to use.

Step 2: Download and Install VirtualBox
- Go to the VirtualBox official website.
- Click on Downloads and select the version compatible with your OS (Windows, macOS, or Linux).
- Run the installer and follow the installation instructions.
- Once installed, launch VirtualBox.

If you experience any error during the installation process like an alert message demanding to install Microsoft C++ 2019 Redistributable package before installing Virtualbox then head to the following website and download and install:


Save all files and restart the system for the new application to take effect.


Step 3: Download the Operating System (OS) ISO File or OVA file from CISCO netacad website:
To install an OS on your virtual machine, you need an ISO file of the operating system. Popular options include:
- Windows (Download from Microsoft)
- Ubuntu/Linux (Download from Ubuntu)
- macOS (If supported, available from Apple Developer)
- Download and install from : CISCO_Netacad
2.8Gb

2.8Gb
8.5Gb


Your Virtual Machine is now ready!
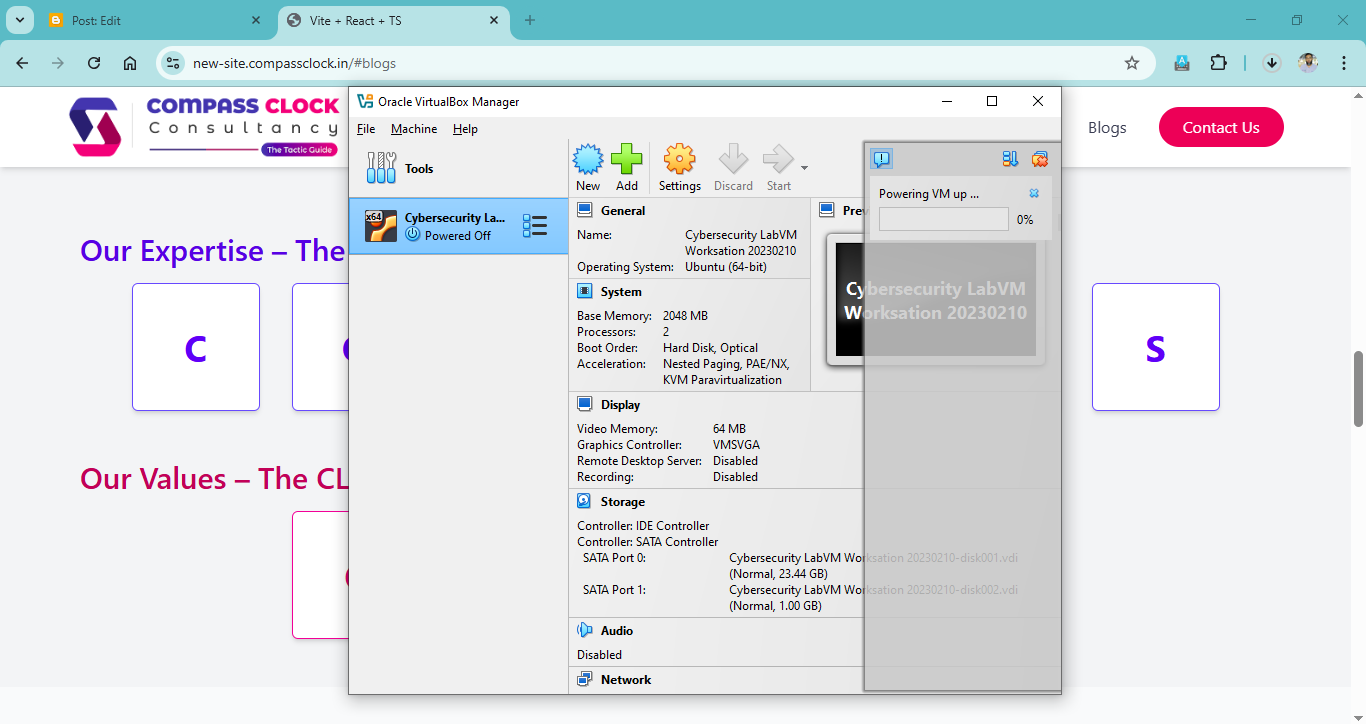 Once the machine is booted you'll see 3 login ids for lab practice:


1. Cybersecurity Analyst / Support Technician (default)Login : ciscoPwd: password
2. SOC Analyst (CyberOps Associate)Login: analystPwd: cyberops
3. Security Engineer (Network Security)Login: sec_adminPwd: net_secPW
1. Cybersecurity Analyst / Support Technician (default)
Login : cisco
Pwd: password
2. SOC Analyst (CyberOps Associate)
Login: analyst
Pwd: cyberops
3. Security Engineer (Network Security)
Login: sec_admin
Pwd: net_secPW
Step 4: Create a New Virtual Machine
- Open VirtualBox and click on New.
- Enter a Name for your virtual machine (e.g., “Ubuntu VM”).
- Select the Type (e.g., Linux, Windows, etc.).
- Choose the Version based on your OS.
- Click Next.
Step 5: Allocate System Resources
- Memory Size: Allocate RAM (at least 2GB for Linux, 4GB+ for Windows).
- Hard Disk: Select Create a virtual hard disk now and click Create.
- Hard Disk Type: Choose VDI (VirtualBox Disk Image).
- Storage on Physical Disk: Choose Dynamically allocated.
- Size: Set the disk size (at least 20GB recommended) and click Create.
Step 6: Install the Operating System
- Select your newly created virtual machine and click Start.
- When prompted, select the downloaded ISO file.
- Follow the installation steps for the chosen OS.
- Once installed, remove the ISO file from the virtual drive and reboot the VM.
Step 7: Install VirtualBox Guest Additions (Optional but Recommended)
- Start your virtual machine.
- Click Devices in the VirtualBox menu.
- Select Insert Guest Additions CD Image.
- Follow the on-screen instructions to install additional drivers and features.
Step 8: Configure and Use Your Virtual Machine
- Adjust display settings, shared folders, and network configurations as needed.
- Take Snapshots before making major changes to your VM.
- Use Seamless Mode (in VirtualBox) to integrate the VM with your host OS.
Conclusion
Installing a virtual machine on your personal computer is a straightforward process that allows you to run multiple operating systems without modifying your main system. Whether for software testing, development, or simply exploring a new OS, VMs provide flexibility and security in a controlled environment.
Happy virtualizing!
No comments:
Post a Comment